


CAUTION
Care is to be taken when removing the dis-
tribution pin to prevent damaging the choke
shaft and poppet valve.
Figure 23. Removing Choke Plate
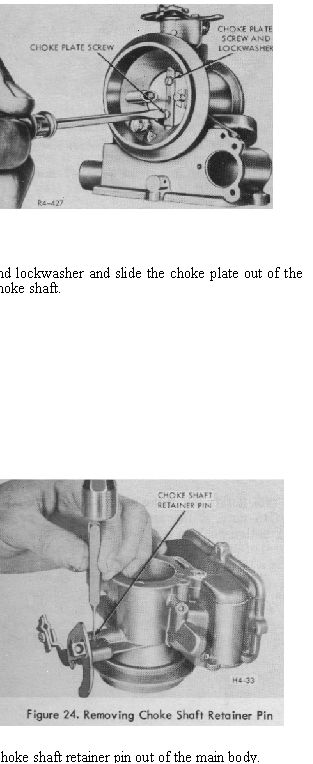
(21) Remove and discard the choke plate screws
NOT
If the tip of the choke plate screw has been
flared out excessively by staking, it is ad-
visable to file off the flared-out portion to
avoid damaging the threads in the choke
when removing the screw. Care is to be taken
while filing the screw tip to avoid damaging
the carburetor bore, choke shaft, or other
components.
(22) Using a small flat-tip punch, drive the
Figure 25. Removing Choke Shaft
(23) Remove the choke shaft and lever assembly
and the choke bracket.
Figure 26. Removing Pump Discharge Nozzle Screw
(24) Remove the pump discharge nozzle screw
and lift out the pump discharge nozzle. Discard the
two gaskets.
NOT
In some versions of this carburetor model the
fuel bowl contains an externally adjusted
needle for regulating fuel flow through the
main jet. Replacements for this main
adjusting needle assembly will be found in
the Master Repair Kit.
Figure 27. Disassembly - Throttle Body Assembly